If you want to learn about Git, GitHub and version control – this is the place to be.
Git and GitHub are two things every developer should know how to use. After all, they are the most popular code version control tool and service respectively in the programming world.
But they can seem pretty intimidating and confusing for anyone new. I mean, are Git and GitHub the same thing? What do they do? Should you use one or the other?
This article will provide a beginner friendly introduction to version control as a general concept including Git and GitHub, explain their differences, and show you how they work with real working examples.
Simply put, version control is how you manage your code from one change to another.
Git is a version control tool that simplifies the process of tracking changes made to your code.
GitHub, on the other hand, is a mostly free cloud-based service allowing you to store your code and any changes you make. You interact with GitHub using Git or a web browser.
Git and GitHub are complementary and best when used together.
Now, let’s examine the following in a little more detail:
- Why is Version Control Important for Developers to know?
- How does Version Control actually work?
- But why maintain different versions of the same code?
- What is Git?
- What is GitHub and Why is it a Big Deal?
- Git vs GitHub: Is There A Difference?
- Using Git and GitHub are Better when used Together
- How to use Git – A Quick Tutorial
- How to use GitHub
- Recommended Resources for Learning Git and GitHub
Why is Version Control Important for Developers to know?
Version control is all about managing changes to code within a project (e.g. a website, a mobile app, a software program or even just documentation) over time.
It is a necessity if you are a developer and you plan to work on a team and work with other developers (hint: if you ever plan to get a developer job!)
As developers do work on a project they write code (right?). New code is written and older code is removed or refactored (made better). Plenty of changes happen within a software project. And we need a way to track who did what and when they did it.
In addition, learning Git or other version control systems will force you to think like a problem solver as we’re about to find out. And that is what will get you hired!
How does Version Control actually work?
Think of version control like a tree. The tree starts out small but eventually grows over time. There is a main trunk. Then there are branches. And leaves too.

Here’s what’s going on:
- The blue circles in the middle represent each change to a single file (or even a set of files) over time. This is like the main trunk of the tree.
- The arrows indicate the flow of time.
- The green circles represent changes to the file but are “branched” off the main trunk. That’s where a developer wanted to make changes to the file without changing the main trunk. Like they are thinking of building a new feature in the “branch”. So a branch has its own change history independent of the main trunk. And a branch can be created from another branch too.
- The dotted arrows indicate changes from branches that were then included (“merged”) back into the main trunk. That’s where a developer now thinks their changes are in good shape and wants them part of the main trunk or main program.
- The purple circle is like a leaf, meaning a change that never gets merged into the main trunk. That’s where a developer tried something but decided it wasn’t such a good idea after all. That happens 😉
But why maintain different versions of the same code?
Why not discard older copies and retain only the most up to date version, you might ask?
Because version control allows software teams to:
- Build features in parallel. Developers can take a snapshot or copy of a program (this can be called “branching”) and do some work on that branch – a branch can represent a new feature. And then later they can include those features into the main program when they are ready (this can be called “merging”). If the feature or change turns out to be not what they wanted it can just be deleted or left alone. And all this branching and merging would be difficult to do without tracking the exact changes made and when they occurred.
- Collaborate efficiently. Not only can features be built in parallel but different team members can work on different parts of an application at the same time and be geographically dispersed. They can share copies of their work or even keep changes private until ready to share.
- Restore previous versions. It’s very useful to revert changes and go back to an earlier state in code. Especially when the current version has problems or there is a need to troubleshoot. Version control makes this easy to do by “checking out” a particular change or point (called a “commit”) in the history of changes and ignoring all the changes after that point.
- Backup their work. With distributed version control there is a copy of the complete change history on every developer’s computer who works on the project. While version control isn’t exactly the same as backup up files it can serve as backup for the project’s code.
- Track what changes made it into which release. When teams create software releases for their programs they can do that by correlating an easy to remember number like release version 1.0 or 2.0, etc. (semantic versioning is one way to do that) to a particular point in the version control change history (to a “commit”). That way they can see all changes between release 1.0 and 2.0 that made it into 2.0.
- Have really good traceability. This means changes to code can be linked to project management and or bug tracking tools to let the team have an end to end view of the work. This can be a great way to help teams know when work is completed or if its been tested and ready for production.
- Find problems in code faster. When a problem or bug is found in a software application it is very convenient to look at the change history to help determine where that bug was first introduced (what went wrong, where and by who!). Otherwise it could be like finding a needle in a haystack… and harder to blame someone ;).
Is it possible to code without using version control? Yes! Do you really want to do that? No!
Without version control things get difficult as a project grows and also when multiple developers begin working on the same code.
What is Git?
Git is a version control tool that makes tracking and saving changes to your code a piece of cake.
Using Git you create what’s called a repo (repository). Then as you make your changes (create new files, edit existing or even delete) you instruct Git to save or commit the changes to those files you want to keep.
And each changed is tracked into what is called a “commit”. Each commit has and identifier and also forces you to add a quick line of text describing the change. This is really helpful when looking back at changes over time.
Git is the most popular version control software for developers because:
- It’s Free to use!
- It’s also fast, scalable (only stores the changes to a file and not full copies of files) and as a result is optimized to work with text (which is what code is).
- Lets you take snapshots of the changes (revisions) you make and save them. You can always revisit the different versions, compare them, or even revert to an earlier version.
- Is a distributed version control system. Meaning it lets you easily share your changes with your friends or co-workers. In other words, you to push your code changes to a remote repository (e.g. to a cloud based hosting service), and other developer can later push their changes to the same repo. After that you can pull changes from the other developers down to your computer (synchronize the repository on your computer with the remote repository to see the changes made by other developers).
What Is GitHub and Why is it a Big Deal?
GitHub is a service for hosting Git repositories. It also acts as a platform for software development and team management.
There are some other Git hosting services such as GitLab, Bitbucket and Azure Repos but GitHub is the most popular by far. This is thanks to its intuitive interface, diverse functionality, and robust community of programmers.
GitHub is so popular that Microsoft was willing to shell out $7.5 billion dollars to acquire it in 2018.
What makes GitHub so great?
- As a hosting service, GitHub lets you push or upload your local Git repository (you created using Git) to the GitHub service in the cloud.
- With your project files hosted in the cloud, you will be able to access your code from anywhere in the world as long as you have internet access.
- If you’re working with other developers on a project, GitHub allows you to see the changes those other members of the team have made.
- If you come across an existing project on GitHub you like, you can clone/download the latest version of the project on your computer so you’ll have the full change history and allows you to make your own contributions.
- And when making contributions, GitHub provides a tool call a “Pull Request” which means you ask the owner of a Git repo permissions to add your code to that repo. They have to review and approve it. Pull Requests are a great way for teams to help reduce bugs and ensure quality.
- Finally, GitHub is a vibrant networking platform for developers. With more than 56 million developers as members, there’s no better place to find social coding projects to contribute to, and meet, interact, and learn from other developers.
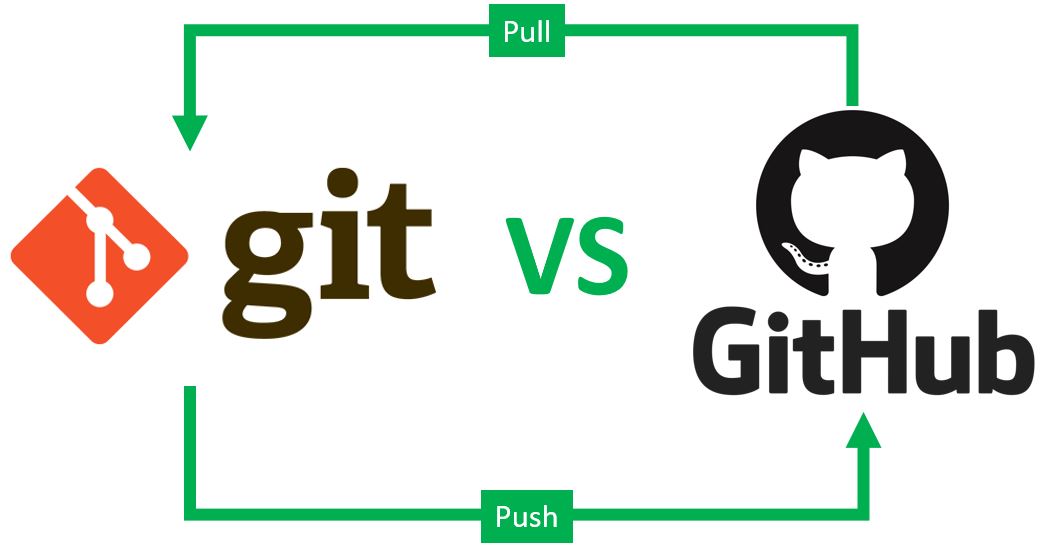
Git vs GitHub: Is There A Difference?
Yes! It turns out while Git and GitHub are not the same they are complementary to each other.
Git is a version control tool while GitHub is a service for hosting/saving Git repositories online.
The main differences between Git and GitHub are:
- Git is a software program you install on your personal computer. GitHub, on the other hand, is an online or cloud based service where Git is the interface or way of communicating with GitHub.
- Git is all about version control but GitHub is more than just that. Besides hosting project files, it’s a collaboration platform, a project and task management tool, and a social networking site for programmers and other tech enthusiasts.
- Git is an open source tool and is free to use. GitHub is a commercial service provided by Microsoft. While the free membership option comes with the core features, you have to pay to access the more advanced features.
Using Git and GitHub are Better when used Together
For developers, Git and services like GitHub being used together are lifesavers. They streamline development work and make maintaining different versions of a project easy. Your really wouldn’t want to write software within a team setting without some form of version control tool and service to go along with it.
The main reason to use Git is so a developer can track changes to their code and work on different features in parallel within the same project.
As for GitHub, it makes collaborating with developers easy and efficient. It doesn’t matter where in the world team members are located. They can work together on the same project pretty seamlessly on GitHub.
GitHub also holds files on a remote server, which not only allows you to access your files from any computer, but also gives you the peace of mind that you have backed up your work.
Do You Have To Use Both Git and GitHub?
You can use Git without GitHub but you can’t really use GitHub without Git.
Git alone works fine for private projects you won’t be sharing with other people.
GitHub (and similar services) on the other hand is great for collaborating with other developers from around the world. You could still do this with just Git but it might be a little bit harder to achieve.
GitHub is also recommended for solo projects, as it allows you access to your projects from anywhere. All you need is internet access.
How To Use Git – A Quick Tutorial

Now we’ll go through a quick tutorial on installing and using Git. Just to get your feet wet.
Download and install Git
It’s easy! here’s how:
Visit this link to download and install the right version for your computer’s operating system.
Once you have Git on your computer, you can use it by entering commands in the terminal or command line interface or control it via a graphical user interface (GUI) such as Sourcetree or GitKraken or Fork.
I recommend getting comfortable with using the command line right from the start (we’ll cover using command line Git in the below tutorial). Learning the basic commands will help you learn the concepts. And many Git resources and discussions online use the command line interface. Using a GUI is great too, if you prefer and once you get past the basics. If you haven’t learned about the terminal yet, here is an introduction for beginners with some great resources to get you up to speed with the command line.
Create a Project Folder
To start using Git, and after you’ve installed it, create a folder for files you want to put under version control.
To do that, open up your terminal or command line. Here we are using the command line, the “mkdir” command and telling it to create the “code” directory.
mkdir codeOr you can also add an existing folder to Git. Here we just change directory “cd” to the directory (path) you want to go to.
cd /path/to/codeAnd now you’re in the directory were we’ll setup our Git repo.
Create a Git Repository
Now that you’re in the directory where you want to create your Git repo, create it by doing:
git initThis action will create a hidden .Git folder in your project folder. Git will store the different versions of your project here.
Create or Edit a File
Now create or add the very first file. I am using the “touch” command to simply create myfile.txt:
touch myfile.txtOr just create a file and put some text into it using your favorite editor. And in that case make sure you save your file before the next step.
Stage your change
To clarify, any file you create or edit while in the working directory (where you created the Git repo) gets noticed by Git but won’t be part of the change history until you tell Git to do so.
Saving a change to the change history is what’s referred to as making a “commit” – you’re saving the changes you’ve made to your project.
But before you commit any change, you will need to stage the change first.
To stage a file, you just tell Git to copy it from the working directory to the staging area or index. That’s fancy for getting the change ready to be saved to the change history.
git add myfile.txtCommit the Change
Commit means saving the changes you make to a project. Each commit becomes a different version of the project.
git commit myfile.txtGit will then ask you for a quick comment. And once you do that and confirm the commit, you’ve now saved your first commit and is now part of the repo’s change history! 🙂 And each commit has its own unique hash code or ID.
View the history of changes
You could then see a log of your change by doing:
git logType “q” to exit (if you are on the command line).
Make another change, stage and commit
Then try making a change to the file (you have to save the file), stage it, and commit the new change. And you’ll then see that second change in the commit history if you do another log command.
Create a branch
Git has a concept of “branches” and by default always has a main or master branch when you create the repo. Branches are like a tree, they stem off the main trunk. And the trunk or main branch is where we’ve been committing code to so far.
Branching makes it possible to work on multiple features at the same time or explore a feature without changing the main project.
Now let’s suppose we want to make changes to our file but we’re not sure if the changes will be what we want in the end so we reserve the right to work on the changes while not messing with the main branch.
Or maybe the main branch represents a website that is in production and we want to build new portions of the site without making it live yet. We can do this!
So we’ll then run the following command to create the “feature1” branch which is a copy of the main branch.
git branch feature1Now make some changes to your file or even add new files. Then save, stage and commit. The commit will be to the feature1 branch.
The green circles in the below image represent the feature1 branch. The first green circle is when we first created the branch and second is the very next commit to it.

Merge your branch back into the main (or master) branch
Now that we’ve done some work in our feature1 branch, we want to bring those changes over to the main (or master) branch. Because we’re confident it was the right code and it should be part of the main program.
The green circles are the feature1 branch and once we’re done will have its changes merged or brought into the main branch (the series of blue circle).

To do that, first switch to the main (or master) branch. The checkout command puts you back into the context of whatever branch you specify (here we specify “main”).
git checkout mainNow run the git merge command with the name of the branch (feature1) we want code to merge from and into main (or master):
git merge feature1And now you’ve successfully merged (brought in your code) from the feature1 branch into the main branch 🙂 and this means the history of the main branch now contains the changes done in the feature1 branch.
And there’s more!
This quick Git tutorial gives context around how to use its basic commands and the fundamental concepts. There are many other commands and concepts not described here that you’ll learn as you begin using Git more often. To learn more visit the Git website.
How To Use GitHub
Now that you’ve set up Git, added a repository, made a couple of commits, created a branch, made changes there and merged back into the main branch, you understand the fundamental operations that GitHub also uses 🙂
With GitHub, you don’t have to download anything on your computer.
Visit this link and create an account on GitHub. The free option gives you access to the core features so it will be sufficient when you’re just getting started.
Once you do that this hello world guide is a good start to using GitHub. You’ll find similar to Git that you can
- Create a Repository on GitHub. It can be made public so others can access and contribute or private.
- Create a branch so you can work on some new things in your repo.
- Merge your changes from your branch back into your main branch.
- Pull down changes from your remote repo to your local repo. This is great for getting the latest changes from others that have contributed or in case you need to get your changes onto a different computer.
- Push changes from your local repo to your remote GitHub repo. That way they’re saved in the cloud.
- Push an already existing repo to GitHub from your local repo. In that case the GitHub becomes your “remote” repository.
- Clone (that means copy) an existing repo from another user’s GitHub account into your GitHub account or to your local computer.
- Fork an existing repo, from another GitHub user, into your account. This is great when you want to make a new project out of an existing project.
- Do a pull request – that’s were you ask permission from a project owner to merge your changes into their project. Once they approve, your code is then merged in.
Recommended Resources for Learning Git and GitHub
This article is an introduction to version control with Git and GitHub. If you followed it you will have actually created a Git repo, made commits, branched and merged. And that’s a HUGE step in the right direction for your coding career!
However, there is a lot more to learn in order to make the most of these version control system.
Check out these resources to learn more:
- The Git Documentation page has all kinds of learning resources from concise tutorials to in-depth guides.
- The Code Academy Learn Git course covers Git workflow, the core features, and how to Collaborate.
- The official GitHub cheat sheets has the commands you will be using often.
- This desktop app requires you to solve challenges to learn Git.
- And this practical tutorial uses puzzles to teach Git.
To Wrap Up
Git and GitHub can seem pretty scary at first but they are actually simple to use, once you get the hang of them.
Learning version control with Git and GitHub will unlock a very efficient way to manage different versions of your code, whether you are working alone or in teams. And will help boost your coding career, especially if you want to become a rockstar developer.
Mike is the creator of Go With Code and a coder at heart 🙂